
How to Record Gameplay on Mac

By Manuela Willbold | July 31, 2024
Table of Contents
Recording gameplay on Mac can be a fun and engaging way to share your experiences with others. This guide will bring to surface a couple of methods to record gameplay on a Mac.
Features of Recording Gameplay

Gameplay recording allows you to capture your screen while playing a game, along with any accompanying audio and camera footage. This opens up a whole new way of sharing your gaming experiences, allowing you to create tutorials, review games, or simply show off your skills.
The first and best thing about recording gameplay is the quality. With a good screen capture tool, your gameplay footage will be crystal clear and look professional. This is especially important if you intend to share your recordings on YouTube or other platforms, where viewers expect high-quality visuals.
Game recordings also allow for better analysis and review of your gameplay. By watching your recorded footage, you can find ways to improve your strategy, learn from mistakes, and spot missed opportunities. Very helpful for competitive gamers who want to constantly improve their skills.
Imaging hosting a Minecraft server and recording the fun times you and your friends had while playing together. You can always look back on these recordings and relive those moments, even if you’ve moved on to other games.
Choosing the Best Game Recording Software
When deciding on the best recording software for Mac, consider the following factors:
- Ease of Use: The software should be user-friendly and easy to navigate, especially if you are new to recording games. Straightforward settings, hotkeys, and intuitive interface are all important features to look for.
- Recording Quality: You can’t compromise on video and audio quality as it’s what, apart from the action, makes your recording stand out. Be sure to look for software with advanced settings to customize the quality.
- Performance: Any stuttering or lagging can ruin the viewing experience and make it difficult to record your gameplay effectively. A screen recorder should run smoothly without significantly impacting your game’s performance.
- Additional Features: Some game recording software comes with additional features like video editing capabilities, live streaming options, and voiceover abilities. If you plan on using these features, be sure to check if the program offers them.
- Compatibility: Ensure the screen capture program is compatible with your Mac’s specifications and supports the games you want to record.
How to Record Gameplay on Mac Using QuickTime
Every Mac user knows about QuickTime. It’s definitely not the best, but comes pre-installed and is free. Here are the steps to record gameplay using QuickTime:
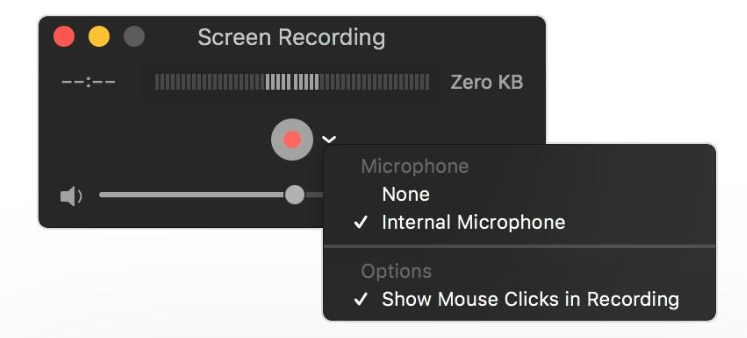
- Open QuickTime Player: You can find QuickTime Player in your Applications folder. Once opened, click on “File” in the menu bar.
- Select New Screen Recording: From the drop-down menu, select “New Screen Recording.” This will open the main recording window.
- Configure Recording Settings: Click the drop-down arrow next to the record button to select your microphone and adjust other settings.
- Record: Click the red record button to start. You can choose to record the entire screen or just a portion.
- Stop Recording: To stop the recording, click the stop button in the menu bar, and QuickTime will automatically save the video file.
How to Record Gameplay on Mac Using Gecata
Gecata by Movavi is an excellent recorder for Mac as it’s made specifically for capturing gaming footage like Minecraft. It offers many more options, with hotkeys, overlays, video settings, and even streaming capabilities.
Here’s how to screen record on a Mac using Gecata:
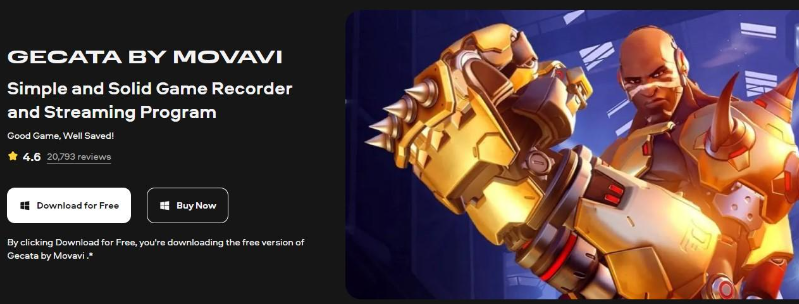
- Download and Install Gecata: Visit the Movavi website to download Gecata. Follow the installation instructions to set it up on your Mac.
- Open Gecata and Configure Settings: Configure recording preferences. Tweak everything from devices to quality/size.
- Start Recording: Click the big red button on the left of the toolbar and launch the game.
- Stop and Save: Gecata will automatically save the video once you close the game. Alternatively, you can press the same button (or a hotkey) to end the session.
- Edit: Before exporting your gameplay video, you can also trim the clip to get the most precious part.
How to Record Gameplay on Mac Using ScreenFlow
ScreenFlow is a powerful game recording software for Mac that also comes with editing capabilities. This makes it a great all-in-one solution for many as you can record, edit and share all from one program.
How to record yourself on Mac and capture gameplay using ScreenFlow:
- Get ScreenFlow: Go to the Telestream website to download ScreenFlow.
- Set Up the Audio: Select your audio source in the ScreenFlow menu, either your computer’s built-in microphone or an external one.
- Start Recording: Click the recording button; a new window will appear for you to check the settings. Click it again to begin.
- End the Session: Once you’re done, click the stop button on the recording window. The video will be saved automatically.
Conclusion
You might not be the next PewDiePie or Ninja, but recording gameplay on your Mac is still a great way to share your gaming journey with others. Whatever game you play, there’s game recording software that will suit your needs.
So, go ahead and record those epic gaming moments, tutorials, or just have fun. Not only will you have a great time playing, but you’ll also have a record of your gaming achievements to look back on in the future.
Author Profile
- Blogger and Educator by Passion | Online Media & PR strategist for ClickDo Ltd. | Fascinated to Write Blogs in News & Education I have completed a journalism summer course at the London School of Journalism and manage various blogs.
Latest entries
 Minecraft Playing TipsJuly 31, 2024How to Record Gameplay on Mac
 Minecraft for ParentsFebruary 16, 2021What Parents need to know about Minecraft
 Minecraft For ChildrenFebruary 15, 2021How Old Do You Have To Be To Play Minecraft?
 Minecraft EditionsFebruary 13, 2021Easy Minecraft Education Learning & Lesson Ideas to use at Home